 | | | | | | | | | | | | | | | | | | | | |
|
| | | | | | |

|
|
| | | | |
(I would like to start out by noting that I have only gotten MailViewer in Rhapsody 5.3 and later to work with my e-mail server. I believe it should be working in 5.1, but I personally haven't done it and haven't attempted it with any other e-mail servers. Much of the mechanics of what I show here should be the same, and seem to work the same, in the 5.1 version.)
|
|
Mail Box Window
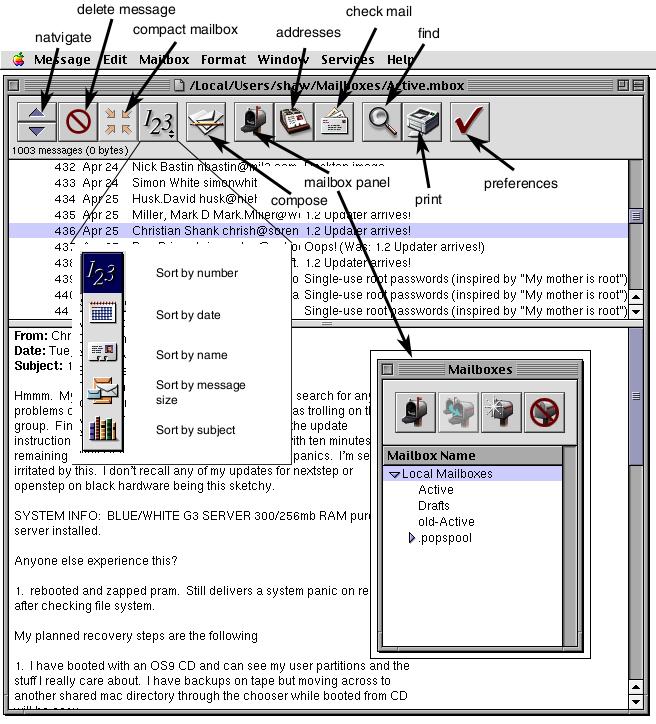
The first thing you are generally presented with is the mail box window for your active (incoming) mailbox. All mail box windows share the same characteristics, so the following diagram should be helpful in guiding you to most of the key features.
|
|
|
|
Managing Mailboxes
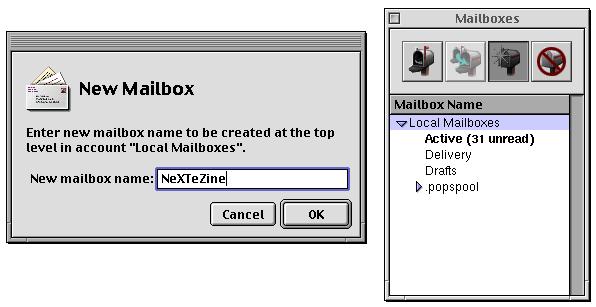
When you start out using MailViewer an Active mailbox is created for you. As you use MailViewer over a period of time, a few other mailboxes can be created by users actions (such as saving drafts). These mailboxes can be accessed and managed via the Mailboxes window.
|
|
| | | | | |

|
|
It is quite common to want to organize your mail. Most mail clients let you create folders or the like, MailViewer isn't that much different. The key difference is that MailViewer uses mailboxes instead of folders/directories like other e-mail clients. So when you create a new mailbox and move things to it, those items are actually in another mailbox file on your system (e-mail clients like Entourage keep everything in a single large database file no matter how many folders you create).
Too create a new mailbox, just click on the "new mailbox" icon. You'll be ask to name your mailbox as shown below. |
|
| |
|
|
To move items, select them in the mailbox window that they are already in (most likely the Active mailbox window as that is where incoming mail is delivered), select the mailbox you want them in from the mailboxes window and then click the transfer button.
Deleting Messages
Today, more than any other time, deleting unwanted messages has become an important part of using an e-mail client. Spam is sent in ever increasing numbers, and for many people, cleaning up a mailbox is the first order of business even before reading the new messages.
MailViewer has an obvious delete button for removing unwanted mail, but it does not actually get rid of the messages. It just removes them from the listed messages shown in a mail box. There is an indicator of the number of messages you have, the space they use, the number of messages deleted and the space they use right under the tool bar of every mail box window (an example of mine is shown below). To actually get completely rid of the messages you need to hit the "compact" button". That gives you back the free space from the messages you deleted.
|
|
| | | | | | |

|
|
Sending Mail
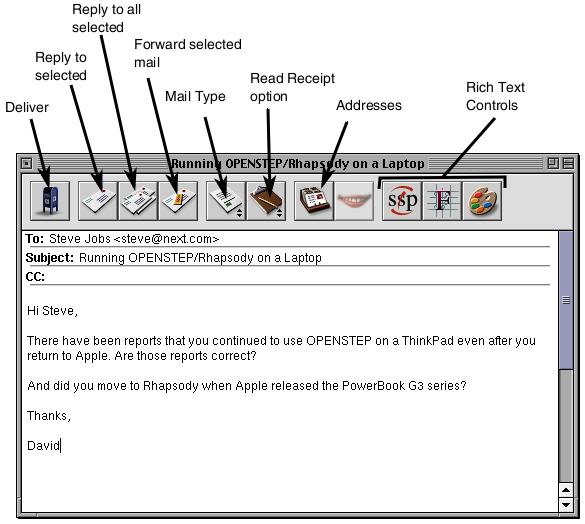
To send a new mail message click on the compose button on any mailbox window (or go to the "Message" menu down to "New Message"). You should be presented with an empty message window in which you can compose your message. The major features are shown in the diagram below.
|
|
| | |
|
|
The buttons are broken into sets. The first set (after the deliver button) is for reply/forward functions. These work by selecting a message (or messages) in a mailbox and then clicking the button of the function you want. The next set are format features. The set after that are MailViewer functions. The address function we'll cover in a moment, the LipService button seems to be disabled (at least on my systems). The last set is for rich text composition within your message.
Addresses
Addresses are added to the "Private Users" directory under "Type" in the Addresses window. Adding addresses is done by copy-pasting or typing out a persons address in the field at the bottom and hitting "add". Similarly, groups are created by selecting the "Private Groups" directory and typing out the name of the group. With a group selected, adding addresses is again done by copy-pasting or typing out a persons address in the field at the bottom.
The find for addresses is built into the text field. By typing in a few characters, the addresses get paired down until you have the address you want (or a small enough group to pick from).
The following animation shows this find ability in action. Instead of using parts of either my first or last name, I used the user name of my e-mail address (racerx). Even though it is in the middle of the address, the address is quickly singled out.
|
|
| | | |
|
|
When composing a message, you can click on the address button and select the "to" and "cc" from your addresses. The following animation is a quick demo of that.
|
|
| | |
|
|
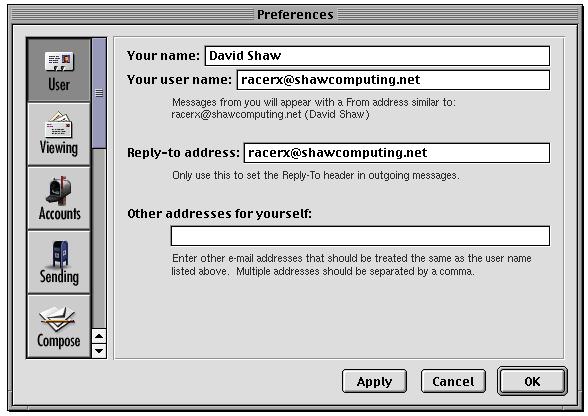
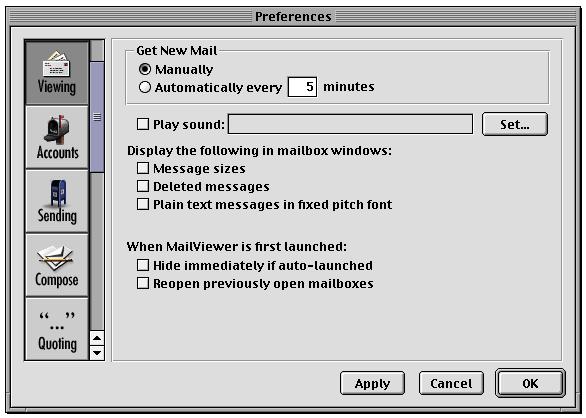
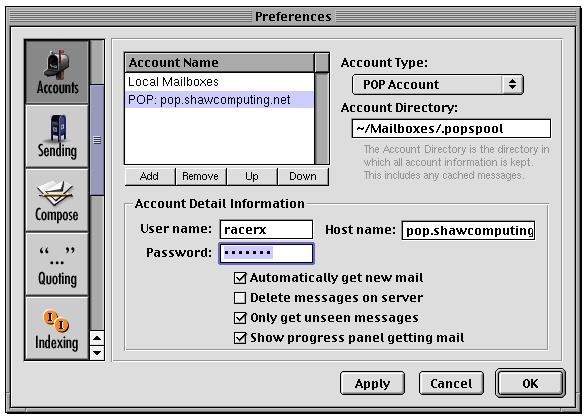
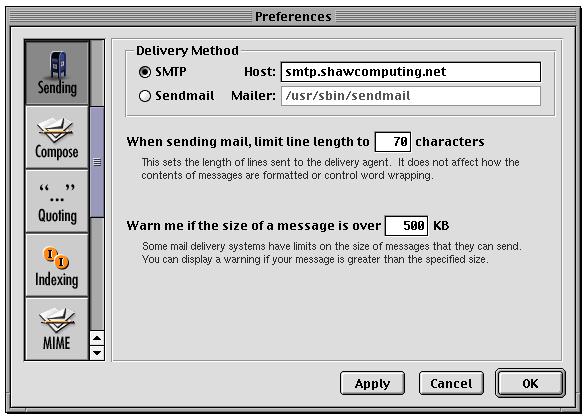
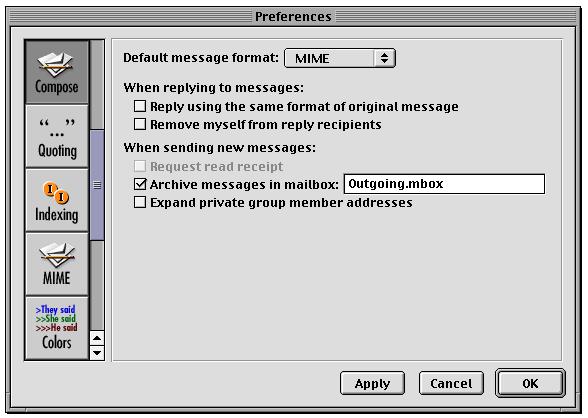
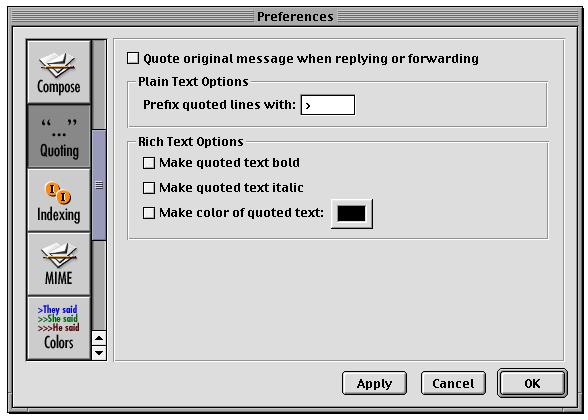
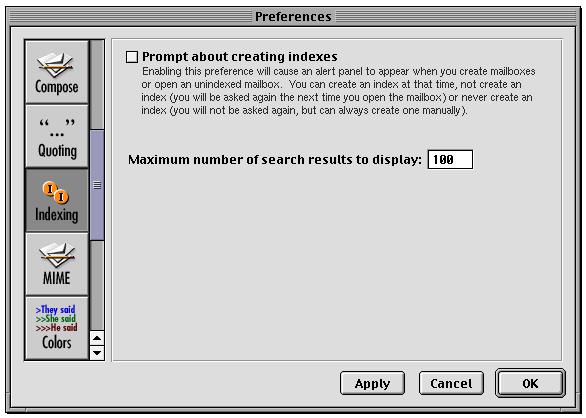
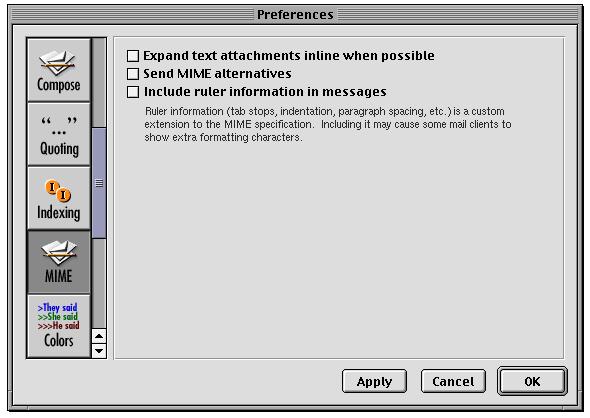
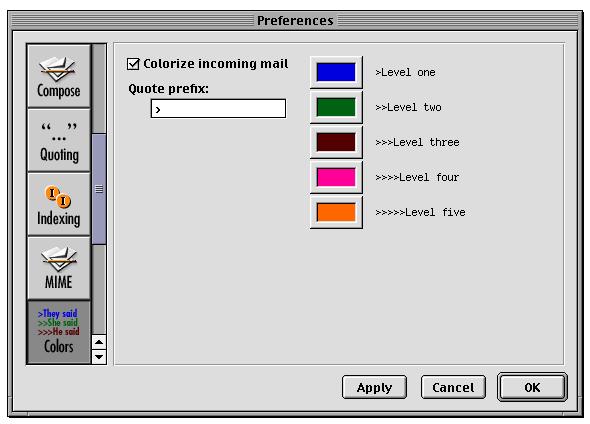
MailViewer Preferences
The following series of images are the panels that make up MailViewer's preferences.
|
|
| | |
|
|
| | |
|
|
| | |
|
|
| | |
|
|
| | |
|
|
| | |
|
|
| | |
|
|
| | |
|
|
| | |
|
|
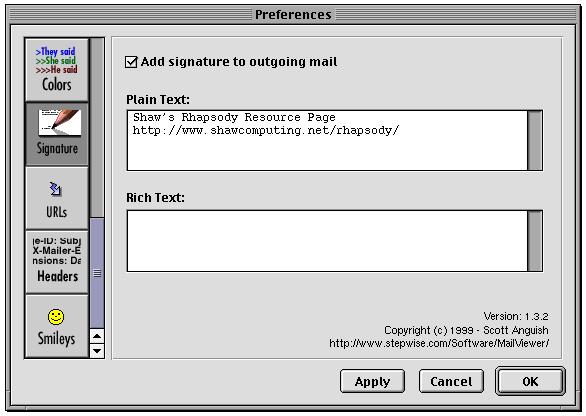
SWSignatures
This is a set of MailViewer plugins put together by Stepwise's Scott Anguish. These additions can be accessed via the preferences panel.
The first is Signatures. You have the option of either plain text or rich text signatures (as seen below, I used plain text). |
|
| | |
|
|
It isn't really enough in this case to show just how the signatures are added, so here is an image of how the signature appeared in a different e-mail client (in this case Mac OS X's Mail).
|
|
| | |

|
|
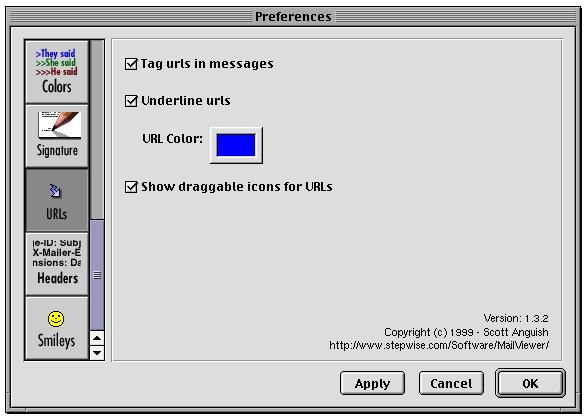
The next plugin enables active links within the body of a message. Any text which appears to be a web address is made into a link which is opened by OmniWeb.
|
| | |
|
|
Todays mail comes with tons of headers. Most of these aren't meant for the reader but are for the e-mail client. As MailViewer is pretty old, it doesn't recognize most of these headers as anything and displays them as part of the message. I have gotten messages where I had to scroll down quite a ways to get past headers to see the actual message. The next plugin helps fix this problem. It comes preset with a number of headers to not show in a message, and is pretty easy to add additional headers (I added about 15). What you are left with is a clean message with just the information that you as a reader need.
|
|
| | |

|
|
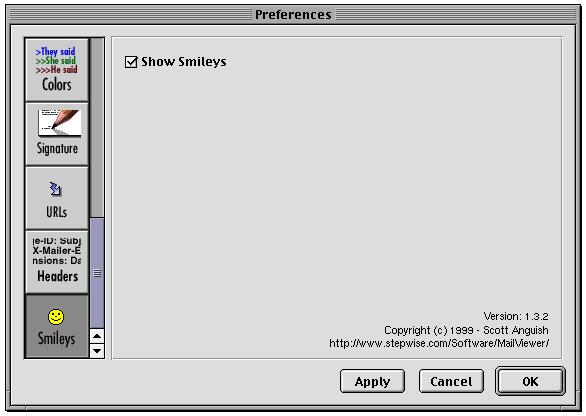
The last plugin is for smileys. As many of us spend almost as much time communicating via forums as e-mail, we have gotten used to seeing at least the standard smileys represented as images. This plugin provides that ability when displaying messages in MailViewer.
|
|
| | |
|
|
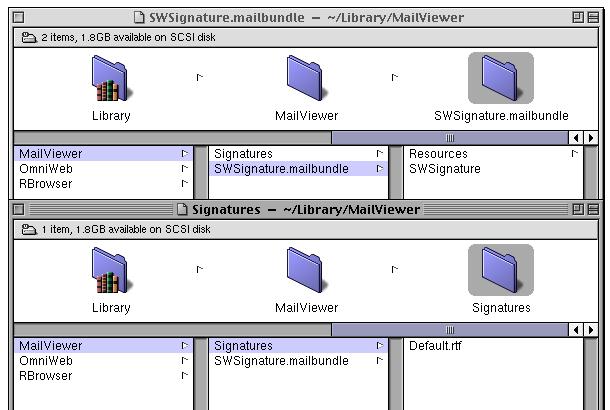
You can get SWSignatures here. This version should work with Rhapsody 5.3 and later. When you get download SWSignatures, you'll be placing the parts in specific directories by hand. As I recall, you need to create a "MailViewer" directory in you home "Library" directory. From there you place the piece where they need to go (the following image is how it looks on my system).
|
|
|
|
|
| | | | | | | |

|
